
 Looking professional both in interviews and on the job is an important element of your professional life. To help add a professional look to your wardrobe, we want to share easy how-to instructions for wearing common tie knots.
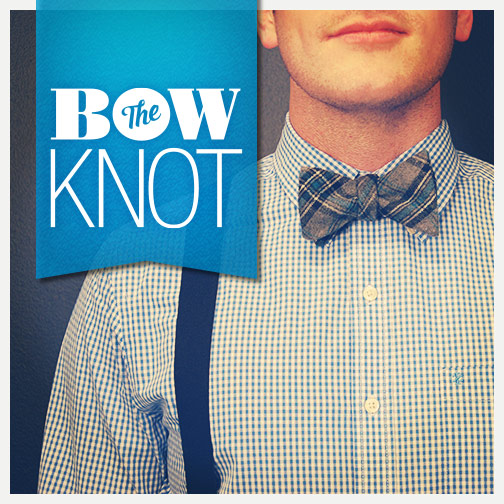
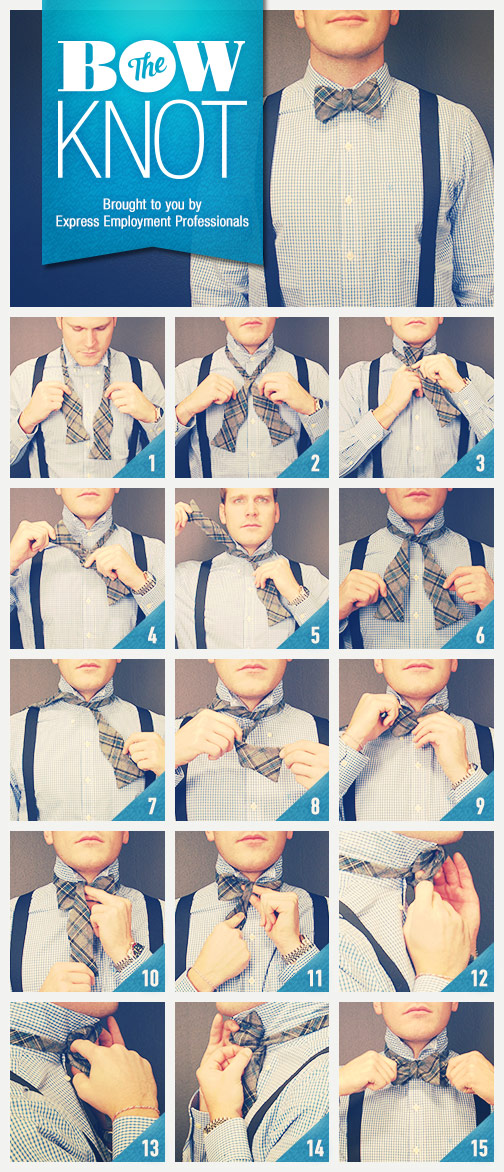
Recently, we shared instructions for completing the Windsor knot and Kelvin knot. This month, check out how to tie a bow-tie knot below.
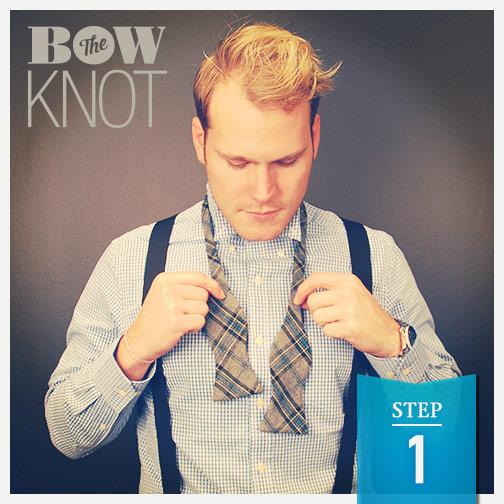
Step One: Before you start, make sure that one end of the bow tie is longer than the other by a few inches.
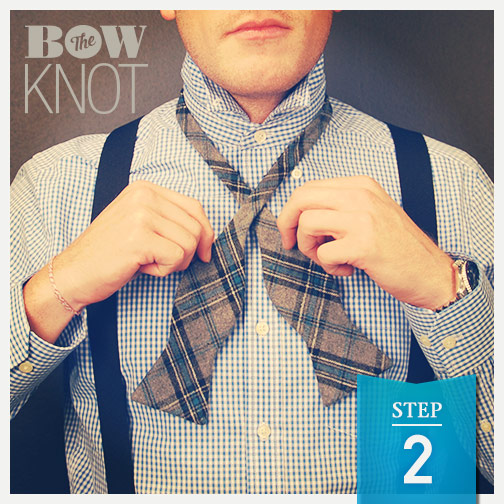
Step Two: Cross the longer end of the tie over the shorter end.
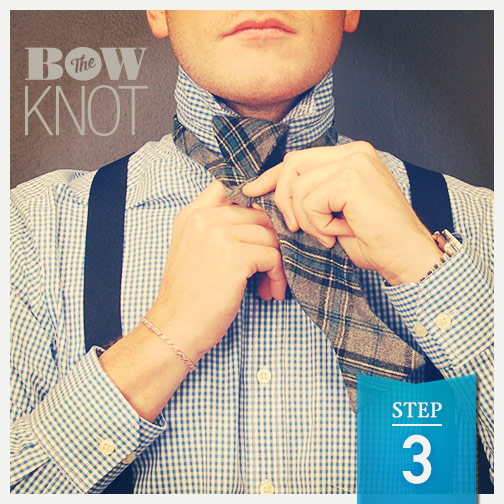
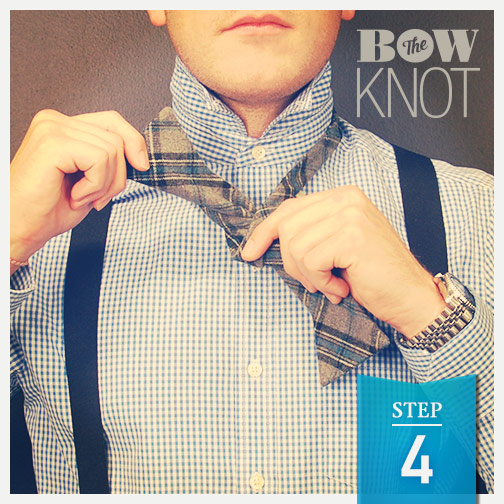
Steps Three Through Five: Bring the longer end of the tie underneath the shorter end.
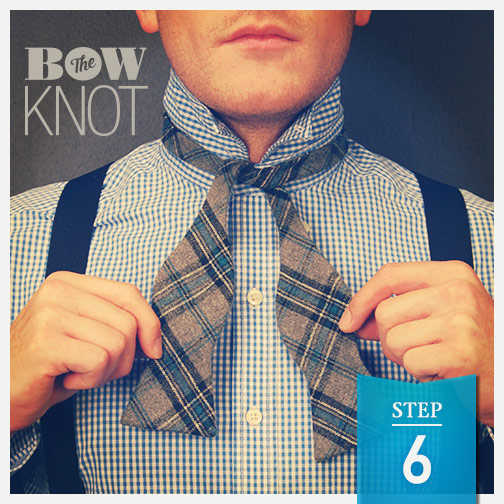
Step Six: Lay the long end flat again.
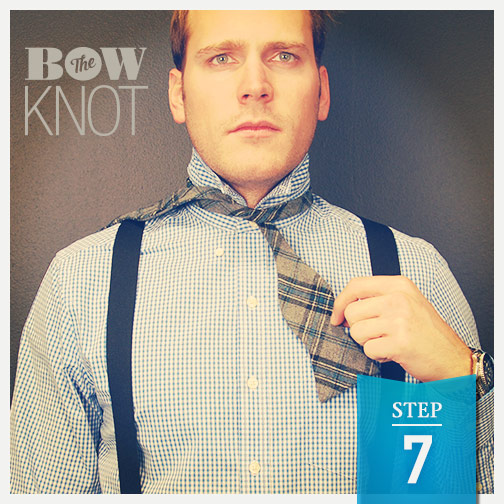
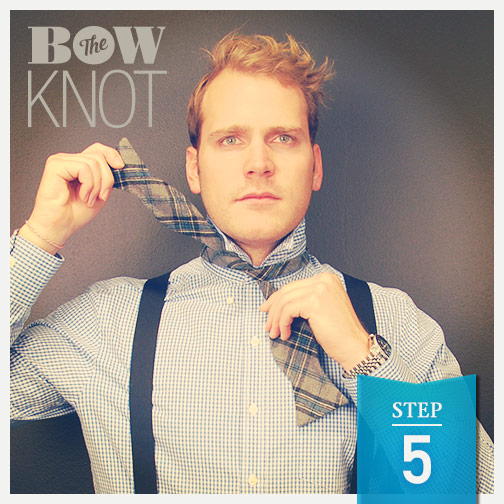
Step Seven: Place the long end over your shoulder.
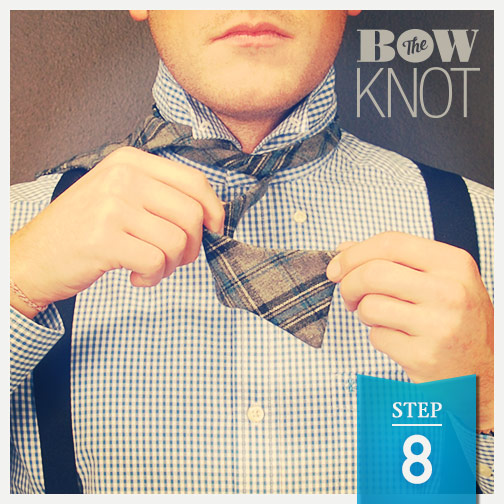
Step Eight: Fold the shorter end of the tie horizontally.
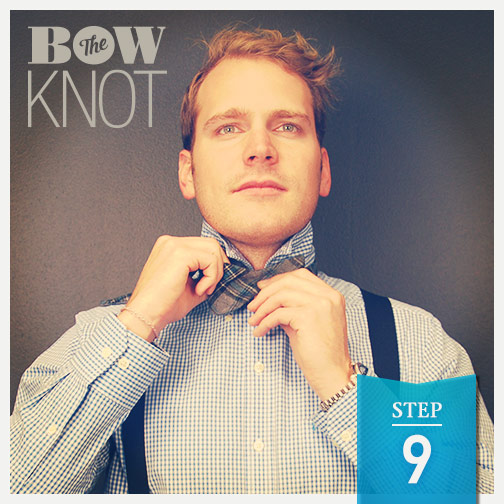
Step Nine: Place the longer end of the tie over the shorter end.
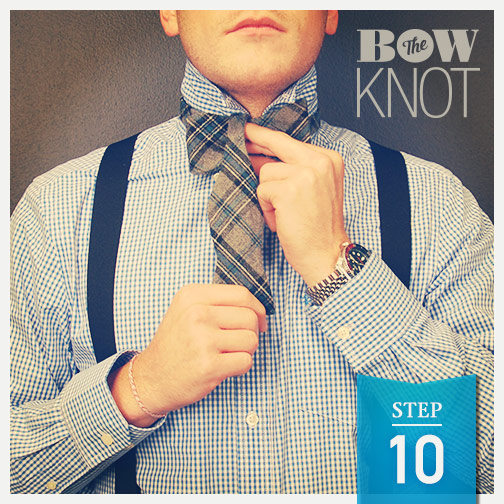
Step 10: Pull the longer end down.
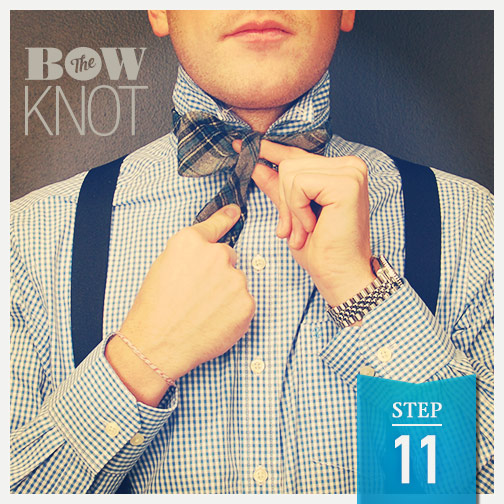
Step 11: Fold the longer end of the tie horizontally and begin to bring it underneath the shorter end.

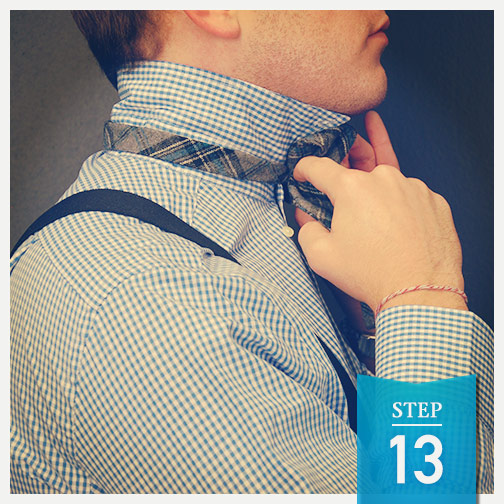
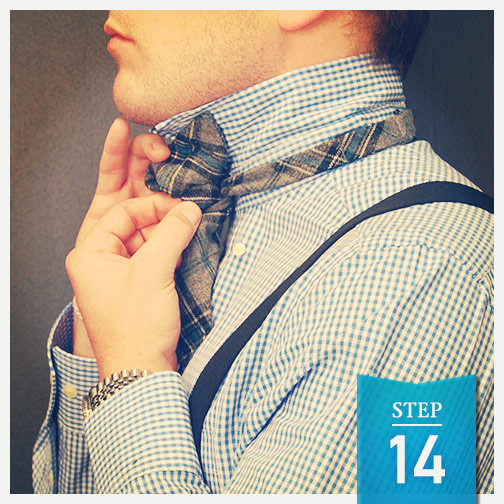
Steps 12 Through 14: Insert the longer end of the bow tie through the loop at the back of the shorter end.
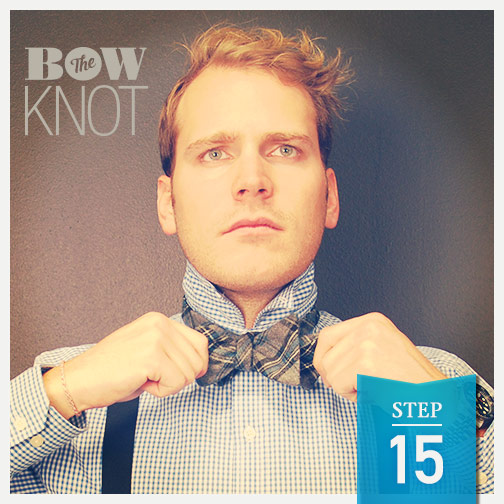
Step 15: Pull on both ends to secure the knot.
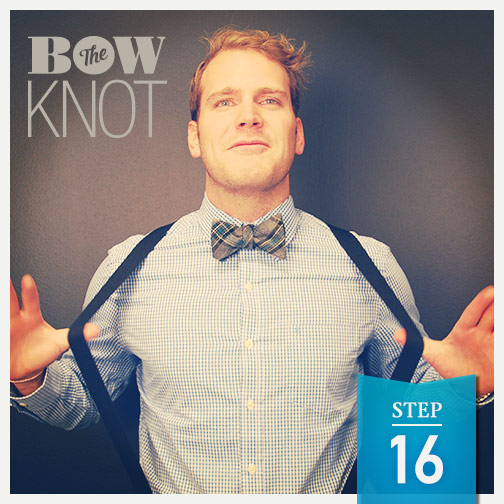
Step 16: Check out your bow tie in the mirror. If it looks good, you’re ready for your interview or workplace!
Were you able to conquer the bow-tie knot? Share these how-to instructions with friends or on social media by sending them this article or by using the image below. Keep watching Movin’ On Up for more tie tricks!
Movin’ On Up is brought to you by Express Employment Professionals.